
Introduction: The Repair Every Beginner Can Actually Do
A doorknob goes through the wall, a picture hook leaves a dent, a moved shelf leaves a row of small holes. Drywall damage looks worse than it is, and for most small and medium holes, learning how to patch a hole in drywall is one of the most satisfying beginner DIY jobs. The materials cost very little, the tools are simple, and a patient repair can disappear completely once painted.
This guide is written for renters and first-time homeowners who have never patched a wall before. It covers the method for each hole size, the tools and materials you need, the drying and sanding steps beginners usually rush, the painting tricks that make a patch invisible, and when to stop and call a professional.
This article is educational only, not professional advice. If the damage involves electrical wiring, plumbing, gas lines, structural framing, mould, or water damage, do not cut into the wall yourself; consult a qualified professional first. Always check for wires and pipes before cutting, wear a dust mask when sanding, and follow every product’s safety instructions.
First, Match the Repair to the Hole Size
The most important decision in drywall repair is also the simplest: use the right method for the size of hole. Spackle on a hole that needs a patch will crack and sink, while a full drywall replacement for a nail hole wastes an afternoon. Here is the quick map.
Tiny holes, under half an inch wide — nail holes, screw holes, small dents, and nail pops — need only lightweight spackle, a putty knife, light sanding, and paint. No patch or tape.
Small to medium holes, from about half an inch to six inches wide, include doorknob holes, anchor holes, and accidental dents and punctures. These are too big for spackle alone, which cracks without support. They need a self-adhesive mesh patch plus joint compound, the main method below, which covers most household damage.
Large holes, over six inches wide, need a new piece of drywall fitted into the opening, supported by wood backing strips or studs, then taped and coated. That is a bigger job; if you are a complete beginner, practice on a less visible wall first or hire a professional, especially near an outlet, switch, or plumbing.
Measure the hole before you buy anything: the widest point, including cracked or crumbling edges that need trimming. Buy a patch that overlaps solid wall by at least an inch on every side; a patch that barely covers the opening will peel at the edges and show through the paint.
Tools and Materials You Will Need
Gather everything before you start. Stopping halfway with wet compound on the wall is how messy repairs happen.
- Self-adhesive mesh drywall patch, sized larger than your hole
- Pre-mixed all-purpose or lightweight joint compound, one small tub
- Lightweight spackle, for tiny holes and final touch-ups
- A 4-inch putty knife and a 6-inch taping knife
- 120-grit and 220-grit sandpaper, or a sanding sponge
- A utility knife with a fresh blade
- A pencil, a stud finder with live-wire detection if you have one, and a drop cloth
- A dust mask, safety glasses, and a damp cloth
- Primer and matching wall paint, plus a small roller or brush
- Painter’s tape for protecting trim and baseboards
A small tub of pre-mixed joint compound is easier for beginners than powder, because there is no mixing ratio to get wrong. Lightweight spackle dries faster and shrinks less, which suits tiny holes, but it is not strong enough to bridge a medium hole on its own.
Safety Before You Touch the Wall
Drywall work is low risk when you respect what may hide inside the wall. Cables often run vertically from outlets and switches, and plumbing can run through bathroom and kitchen walls, so before you cut or enlarge any opening, look at what is nearby and be extra careful.
Use a stud finder with live-wire detection if you have one, and never plunge a blade deep into a wall cavity. If you see wires, pipes, damp insulation, mould, or a soft, sagging area suggesting a leak, stop: that damage has a cause filler will not fix.
Wear a dust mask and safety glasses when sanding, and lay a drop cloth, because dust travels further than you expect. Keep children and pets out of the room while you sand. If you rent, check your lease first: many landlords prefer to be told about wall damage, and some require specific paint for touch-ups.
Step by Step: Patching a Small to Medium Hole
This is the core method. Work slowly, keep your coats thin, and let each coat dry fully. Thin coats are the secret of the whole job.
Step 1: Prepare the Hole
Lay the drop cloth and tape off nearby trim. Use the utility knife to trim away loose paper, crumbling gypsum, and ragged edges, cutting only at the surface, so the patch can bond to solid edges. Wipe away dust with a damp cloth, because compound does not stick well to a dusty surface, and let the area dry for a few minutes.
If a nail or screw is sticking out near the hole, drive it slightly below the surface or remove it. A proud fastener will push through your patch and show as a bump later. This is also the moment to check one more time that nothing behind the opening looks like wiring or plumbing.
Step 2: Apply the Mesh Patch
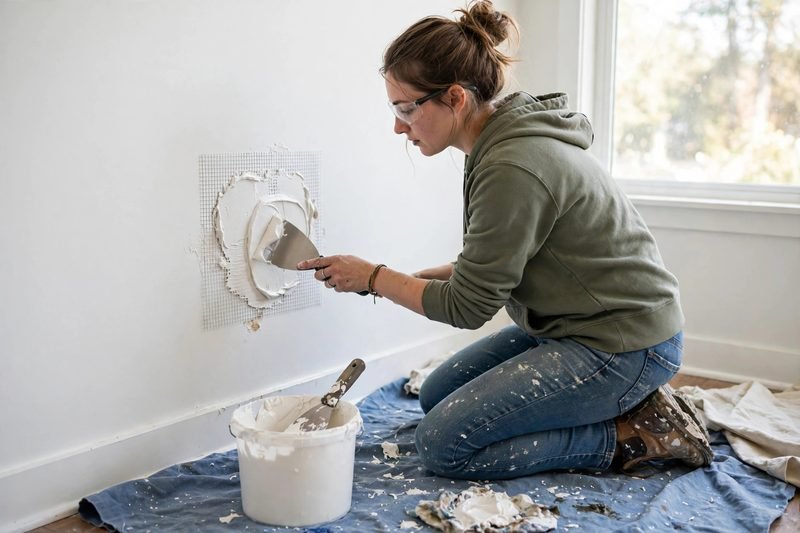
Peel the backing and centre the patch over the hole, pressing firmly so it sticks flat all the way around and overlaps solid wall by at least an inch on every side. Do not press into the middle of the hole, which can push the patch inward and create a dip.
Run your hand over the patch. It should feel flat and secure, with no lifted corners. If a corner will not stick, wipe that spot clean and press again before any compound goes on.
Step 3: Apply the First Coat of Joint Compound
Load your 4-inch knife with a small amount of compound. Press it firmly through the mesh in two directions so it fills the weave, then skim it flat, extending a couple of inches past the patch. Keep this coat thin: its job is to fill and bond, not build thickness.
Scrape off the excess with the knife held at a low angle. The surface should look mostly flat, with the mesh faintly visible through a thin skim. A thick first coat takes longer to dry, shrinks, cracks, and needs heavy sanding. Thin wins every time.
Step 4: Let It Dry Completely, Then Add a Second Coat
Let the first coat dry fully, usually at least a few hours and often overnight for a medium patch. Do not judge dryness by the surface alone: press gently near the edge, and if it feels cool or damp, wait longer. Painting or sanding over damp compound is the most common reason a repair fails.
Once dry, apply a second, wider coat with the 6-inch knife, feathering the edges outward: press a little harder and angle the knife so the compound thins until it blends into the wall. This wider coat hides the patch edge. Let it dry fully. Most medium patches need two coats; a third thin coat is fine if the outline still shows after sanding.
Step 5: Sand Smooth, Without Sanding Too Much
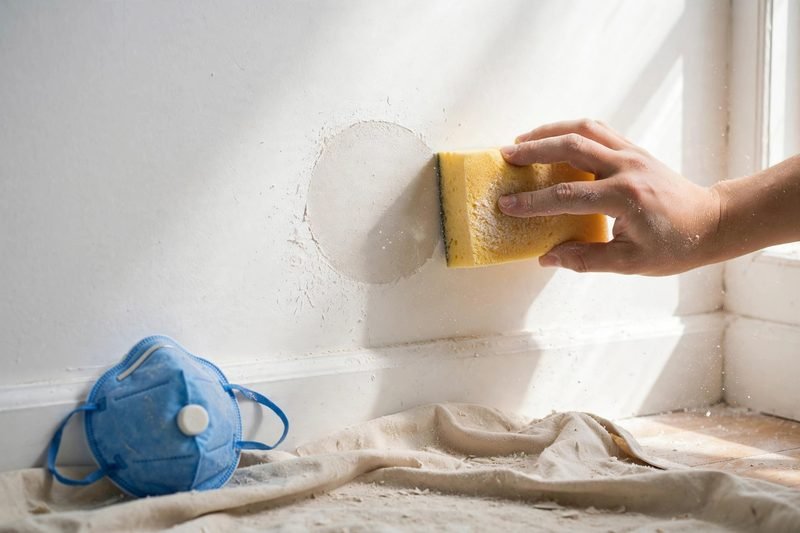
Sand lightly with 120-grit sandpaper or a sanding sponge, then finish with 220-grit. Sand the compound, not the wall around it. The goal is a surface that feels flat when you run your hand across it with your eyes closed.
Stop the moment the surface feels smooth. Over-sanding wears through the compound, exposes the mesh, and forces another coat. Wipe dust away with a slightly damp cloth, let the wall dry, and check it in side light, which reveals bumps overhead light hides. Fix any ridge now, not after painting.
Step 6: Prime, Then Paint
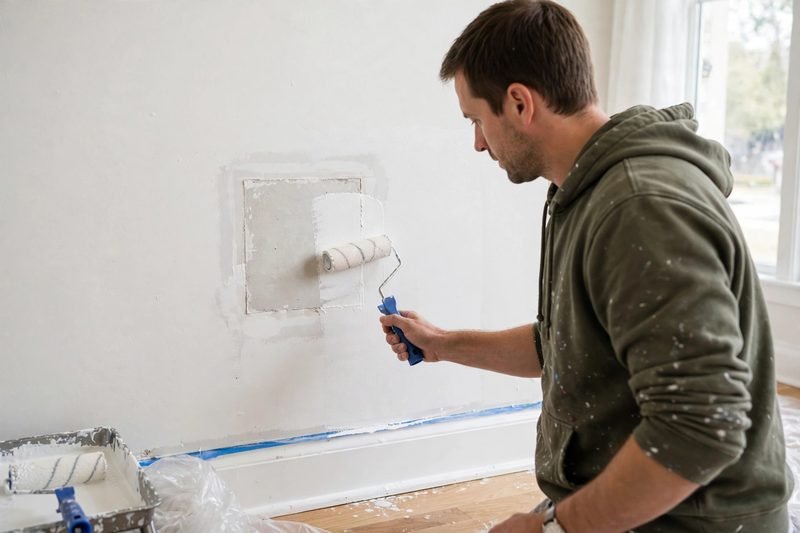
Primer is not optional: bare joint compound absorbs paint differently from the surrounding wall, leaving a dull spot called flashing. One coat of primer over the patched area seals the surface so paint goes on evenly.
After the primer dries, paint with matching paint, using a small roller for a rolled wall or a brush if the wall was originally brushed. Apply two thin coats, letting the first dry fully, and feather the paint slightly beyond the patch so there is no hard edge. If the wall has texture, such as orange peel, apply a matching texture spray before priming, following its instructions.
Quick Method: Tiny Nail Holes and Small Dents
Tiny holes do not need a patch. Clean away loose dust, press a small amount of lightweight spackle into the hole with your fingertip or a small putty knife, and scrape it flush with the wall. Less is more here. Overfilling means extra sanding and a visible bump.
Let the spackle dry fully, often under an hour, then sand lightly and wipe away the dust. Touch up with matching paint dabbed on with a small brush or soft cloth. A nail pop needs one extra step: drive a drywall screw an inch above or below the nail into the stud, dimple it slightly, and spackle over both spots, or the pop will return.
Matching Paint So the Repair Disappears
Paint matching defeats more repairs than patching itself. If you have leftover paint, use it, stirred well. If not, take a coin-sized paint chip from a hidden spot, such as inside a closet or behind a switch plate, to the paint store for colour matching.
Match the sheen as well as the colour. Flat, eggshell, satin, and semi-gloss reflect light differently, and the right colour in the wrong sheen still shows. If the whole wall is old and faded, painting it corner to corner is the reliable fix, because the eye notices no edge to compare.
Mistakes to Avoid
- Using spackle alone on a hole wider than half an inch, where it will crack without support
- Buying a patch that barely covers the hole instead of overlapping solid wall by an inch
- Applying one thick coat of compound instead of two or three thin coats
- Sanding or painting before the compound is fully dry
- Sanding so hard you expose the mesh and have to start over
- Skipping primer, which leaves a dull flashing spot that paint cannot hide
- Painting with one thick coat instead of two thin coats
- Cutting into a wall without checking for wires, pipes, or signs of water damage
- Ignoring damp, soft, or mouldy drywall and covering it with a patch
- Touching up with the wrong paint sheen, which shows even when the colour is right
If a repair goes wrong, it is almost always fixable: let everything dry, sand lightly, and add another thin coat. Drywall repair forgives patience and punishes rushing.
How Long It Takes, and What It Costs
A tiny nail-hole repair takes under an hour including drying. A small to medium patch takes about 30 minutes of hands-on work spread across a day or two, because drying does most of the waiting. Budget a full day from patch to paint, and do not paint the same evening unless the label says the compound is fully dry.
Cost is modest. A mesh patch, a small tub of joint compound, sandpaper, and a putty knife usually cost less than a single professional call-out, and leftover compound covers several future repairs. Primer and paint are the variable cost, depending on whether you already have matching paint.
When to Call a Professional Instead
Call a qualified professional if the hole is larger than about a foot wide, if the wall feels soft, damp, or sagging, if you see mould or smell dampness, if the damage is near electrical panels, gas lines, or major plumbing, or if the framing itself is damaged. Ceiling damage also belongs to a professional, because it often has a different cause, such as a roof or plumbing leak above.
Knowing how to patch a hole in drywall includes knowing which holes are not yours to patch. A professional repair of a large hole is cheaper than fixing a botched repair plus the original problem.
A Confident Finish
Learning how to patch a hole in drywall pays off every time you move furniture or hang a picture. Start with the smallest hole you can find, follow the thin-coat rule, let everything dry, prime before you paint, and check your work in side light before you call it done.
If you are setting up your first home, you may also enjoy our other beginner guides on this site. Learn more about who we are on the About page, and if you have a question about a repair or an idea for a future guide, we would love to hear from you through the Contact Us page. For how we handle your information and the limits of educational content, please read our Privacy Policy and Disclaimer pages.
Pick a small hole, gather your tools, and start today. A wall that looks untouched is a very satisfying thing to stand back and admire.