
Introduction
Few household sounds are as maddening as a toilet that never stops running. It hisses through the night, refills itself every few minutes when nobody has used it, and quietly adds gallons to your water bill. The good news is that learning how to fix a running toilet is one of the easiest beginner plumbing jobs there is. Most running toilets are fixed in under an hour with no special skills and parts that cost less than a takeout lunch.
This guide walks you through the job in order, from the simplest checks that need no tools at all to replacing the two parts that cause most running toilets. Start at the top, test the toilet after each step, and stop as soon as the running stops. You will also learn how to tell which part is at fault before you buy anything, and when to call a plumber instead.
What a Running Toilet Actually Is
A running toilet is a toilet whose fill valve keeps letting water into the tank after it should have shut off. The usual reason is that water is escaping from the tank somewhere, so the valve keeps topping it back up, or the valve itself never gets the signal to stop. Either way, the result is the same: a faint hiss, a toilet that refills on its own every few minutes (plumbers call this a phantom flush), and wasted water that can reach hundreds of gallons a month.
Three parts inside the tank explain almost every running toilet. The fill valve lets clean water in after a flush. The float rises with the water and shuts the fill valve off at the right level. The flapper is the rubber seal at the bottom of the tank that lifts to flush and drops back to hold water in. When any one of these wears out, sticks, or falls out of adjustment, water leaks past the flapper or spills down the overflow tube, and the fill valve keeps cycling to replace it.
Tools and Parts You Will Need
Gather before you start: an adjustable wrench, channel-lock pliers, a flathead screwdriver, a sponge and a small bucket or cup for the last inch of tank water, an old towel for drips, and a pair of rubber gloves if you dislike reaching into tank water. For parts, a universal flapper costs under 15 dollars and a fill valve under 25 dollars. Buy the flapper only after diagnosis, or buy both and return the unused one.
A note on matching parts: flappers come in 2-inch and 3-inch sizes, and the wrong size will not seal. Bring the old flapper with you to the store so the new one matches. Most modern fill valves are universal and adjustable to different tank heights.
Safety First
This is a low-risk job, but a few precautions keep it that way:
- Turn the water off before removing parts. The shutoff valve is usually on the wall or floor behind the toilet. Turn it clockwise until it stops, then flush to drain the tank.
- Never force a stuck shutoff valve. If it will not turn or it drips when you move it, stop. A broken supply valve is a plumber’s job, not a beginner fix.
- Watch for cracked porcelain. If you see a crack in the tank or bowl, or water pooling at the base of the toilet, stop and call a professional. Cracked porcelain can fail suddenly.
- If you rent, check your lease before replacing parts. Adjusting the float and chain is routine maintenance, but replacing a fill valve may need your landlord’s approval. Keep the old parts if you replace them.
- Call a professional if the toilet rocks on its base, you smell sewer gas, the supply valve is seized, or the running returns after you have replaced both the flapper and the fill valve. Those are signs of a deeper problem.
This article is educational only and is not professional advice. For electrical, plumbing, gas, or structural work, always consult a qualified professional.
Step 1: The 60-Second Diagnosis
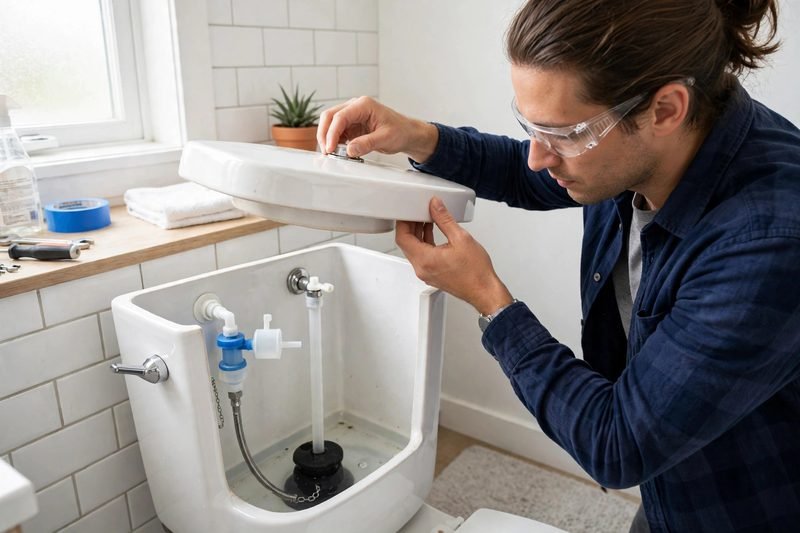
Before you buy anything or take anything apart, find out which part is at fault. Lift the tank lid and set it aside safely, then flush and watch what the water does.
First, the jiggle test. If jiggling the handle stops the running, the problem is the chain or the handle: something is holding the flapper slightly open. That is the cheapest fix in plumbing.
Second, the overflow check. Look at the water level in the tank. It should sit about an inch below the top of the overflow tube, the tall open pipe in the middle of the tank. If water is flowing over the top of the overflow tube, your problem is the water level or the fill valve, not the flapper.
Third, the dye test. Put a few drops of food coloring in the tank water and do not flush. Wait 15 to 20 minutes, then look in the bowl. If color appears in the bowl, tank water is leaking past the flapper. Case closed: the flapper or its seat is the problem. If the bowl stays clear and the water level is correct, the fill valve is the likely suspect.
Write down what you found before you move on.
Step 2: Fix the Chain and Handle
If the jiggle test stopped the running, start here. It takes about five minutes and no new parts.
Look at the chain that connects the flush handle lever to the flapper. It should have about half an inch of slack when the flapper is closed. If it is too tight, it holds the flapper slightly open and water leaks through constantly. If it is too long, the extra chain can kink and slip under the flapper, holding it open the same way.
Adjust the chain by moving its hook to a different link: shorten it if it is too loose and tangled, lengthen it if it is too tight. Test by flushing and watching the flapper drop flat onto its seat. Also check that the handle itself is not sticking. If the handle feels stiff or does not spring back, clean rust and mineral deposits off the lever and the lift arm inside the tank, and tighten any loose handle nut, remembering that handle nuts often tighten in the opposite direction from normal.
Flush twice and listen. If the running is gone, you are done.
Step 3: Lower the Water Level
If water was spilling into the overflow tube, the float is set too high. This fix also needs no new parts.
Find your float. Older toilets have a ball float on a long metal arm; newer ones have a float cup that slides up and down on the fill valve shaft. For a ball float, bend the arm gently downward a little, or turn the adjustment screw at the top of the fill valve. For a float cup, squeeze the clip on the side of the cup and slide it down, or turn the adjustment screw on top of the valve. Lower the water level so it shuts off about an inch below the top of the overflow tube. Many tanks have a marked water line to guide you.
Flush and watch the tank refill. The water should stop rising at the new level and stay there. If the fill valve keeps letting water in even with the float lowered, the valve itself is failing, so move on to Step 5. If the level holds and the running stops, you are done.
Step 4: Replace the Flapper
If the dye test showed a leak, the flapper is worn out. Rubber flappers harden and warp with age, and chlorine in tap water speeds that up, so a flapper older than about five years is a prime suspect. This is the single most common fix for a running toilet.
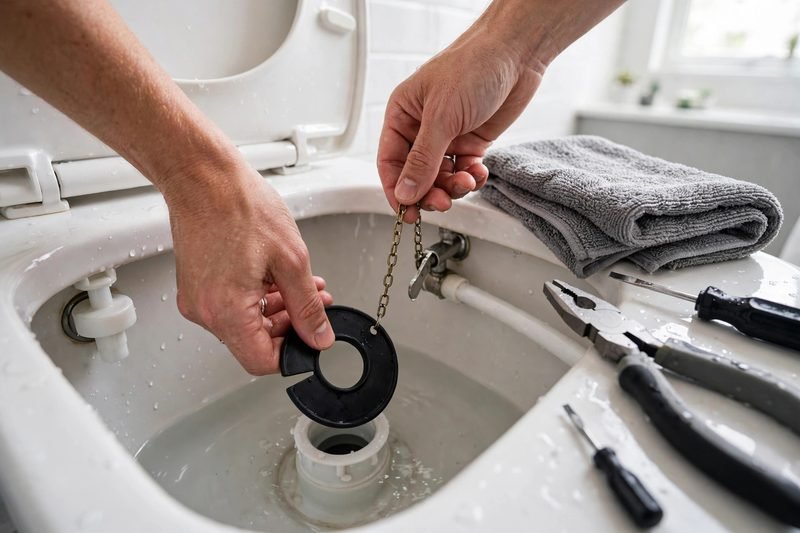
- Turn off the water at the shutoff valve, flush to drain the tank, and sponge out the remaining water into your bucket.
- Unhook the chain from the flapper, then slide the old flapper off its two pegs on the overflow tube. Note how it attaches, since the new one goes on the same way.
- Wipe the flush valve seat, the rim the flapper sits on, clean with a soft cloth. A slimy or gritty seat can stop even a new flapper from sealing.
- Snap the new flapper onto the pegs and reattach the chain with about half an inch of slack. This detail decides whether the repair works: too long and the chain slips under the flapper, too short and it holds the seal open.
- Turn the water back on, let the tank fill, and flush twice. Listen for running and repeat the dye test if you want to be sure.
A new flapper usually stops the leak immediately. If the toilet still runs after a new flapper and a correct chain, the flush valve seat itself may be cracked or warped, which is a bigger repair, and a plumber should handle it.
Step 5: Replace the Fill Valve
If the water level is correct and the flapper seals, but the fill valve still will not shut off, or it hisses constantly, the valve is worn out. Replacing it sounds intimidating, but it is a straightforward swap, usually under 30 minutes.
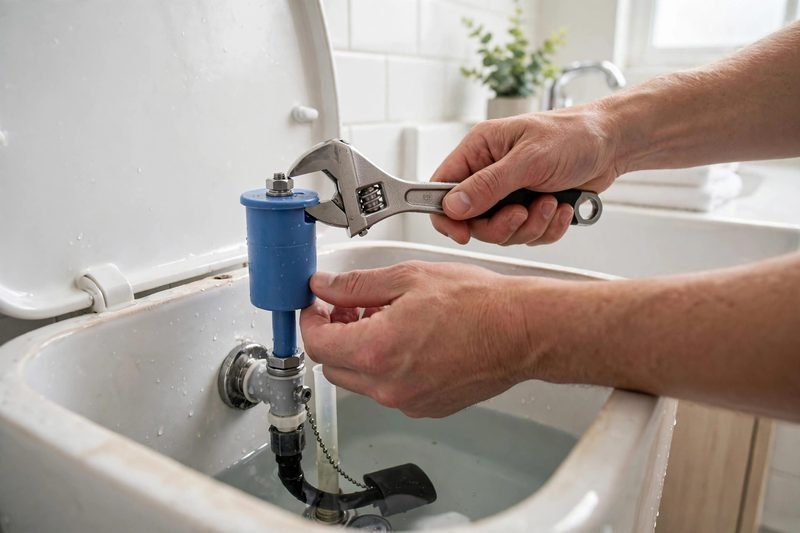
- Turn off the water, flush, and sponge the tank dry. Lay a towel around the base to catch drips.
- Disconnect the water supply line from the bottom of the old fill valve with your adjustable wrench, holding a bucket underneath for the small amount of water in the line.
- Unscrew the lock nut under the tank that holds the old valve, lift the old valve out, and set it aside.
- Adjust the new valve to your tank’s height following the instructions on the box, then drop it into the same hole and tighten the lock nut snugly by hand, plus a quarter turn with pliers. Do not overtighten, or you can crack the porcelain.
- Reconnect the supply line and the refill tube, clipping the refill tube to the top of the overflow tube so it points down into the tube, not dangling inside it. A refill tube hanging down inside the overflow tube can siphon water out of the tank continuously.
- Turn the water on slowly, check every connection for drips, and adjust the float so the water shuts off about an inch below the overflow tube. Flush twice and listen.
What a Running Toilet Costs You
It is easy to ignore a running toilet because it still flushes fine, but learning how to fix a running toilet promptly matters because the waste is real. A constant small trickle can waste hundreds of gallons a month, and a badly running toilet can waste 200 gallons a day, adding real money to your water bill. A plumber visit for the same job typically runs 150 to 300 dollars, while do-it-yourself parts run about 5 to 25 dollars.
Frequently Asked Questions
Can I fix a running toilet without turning off the water?
For the chain and float checks, yes, since you are not removing parts. For replacing a flapper or a fill valve, always turn the water off first, or you will be working in a tank that keeps refilling while you try to fit parts.
How do I know if my flapper is 2-inch or 3-inch?
Measure the drain opening under the flapper, or bring the old flapper to the store. A 2-inch flapper is about the size of a tennis ball, while a 3-inch flapper is noticeably larger. When in doubt, bring the old one with you.
A Quiet Closing
Fixing a running toilet is a small job with an outsized reward: a bathroom that sounds calm again and a water bill that stops climbing. Start with the 60-second diagnosis, fix the chain, set the water level, replace the flapper, and swap the fill valve only if you need to. Most toilets go silent by step four.
If you found this guide useful, you may also enjoy our beginner’s guide to patching a hole in drywall, our guide to unclogging a drain without chemicals, and our guide to fixing a squeaky door hinge, and you can learn more about this site on our About page, reach us through our Contact Us page, or read our Privacy Policy and Disclaimer.